Cleaning up wedding photos in Google Photos
Bulk edit wedding photos in Google Photos — enhance, crop, and describe a guest album without spending the next month on it.
Batch is not affiliated with Google. Google Photos is a trademark of Google LLC.
The wedding was four weeks ago. Your photographer's gallery is still six to eight weeks out. Meanwhile, you have a Google Photos shared album with 1,200 photos that guests dropped in via the QR code on the table cards. Some are beautiful. Many are dark. The reception lighting made everyone's phone struggle. There are duplicates. Some bad angles. And your grandparents are asking when they'll get to see something.
This post is what to do while you wait. The shared album is yours to organize, edit, and share now. The photographer's gallery shows up when it shows up, and when it does, you can fold the favorites into the same shared album so your grandparents see one curated story instead of two.
Here's the arc. Set up the album, or fix it if you set it up but didn't get the contributor permissions right. Consolidate photos that didn't come through the QR code. Organize 1,000+ photos by event so you can actually find anything. Fix the editing problems at the scale they actually exist. Share with family in a way that works for the people who don't use Google.
By the end you'll have a wedding album that feels finished.
Setting up your wedding shared album
If you haven't created a shared album yet, or if you created one but guests can't add photos, start here. In Google Photos, go to your library's Sharing section, create a shared album, then open the album's Settings and toggle Allow contributors on. Without contributor access, the album is read-only and the guest-photo workflow doesn't happen.
The album link is shareable to anyone. They don't need a Google account to view, but they need one to upload photos. Include this in the link copy you send out: "Drop your wedding photos here. You'll need a Google account to upload, but no account needed to view."
Shared albums in Google Photos hold tens of thousands of photos with hundreds of contributors, plenty for any wedding.
A tip: pin the album to your library so it stays at the top of your sharing list. As guests upload over the next few weeks, you'll be visiting it constantly, keep it one tap away.
Getting all your photos in one place
Not every guest uses the shared album. Your aunt texts you photos. Your dad AirDrops them. The photographer's second shooter sends a Dropbox link with a few candids. Your partner's phone has photos that never made it to the album because they shot them in airplane mode all day.
Pulling outside-channel photos into the shared album is straightforward. From your phone, the photos are already in Google Photos via auto-backup. Open them in your library, multi-select, then tap the share button and choose Add to album, your wedding album. From a desktop, photographer's Dropbox link, an external camera card, go to photos.google.com, click the upload control in the top toolbar, and either drag files in or browse. Once they're in your library, the same Add to album flow gets them into the shared collection.
If your photographer (when the gallery lands) gives you access to their Pixieset or similar platform, pull a few of your favorites manually into the shared album. That way grandma sees one curated story, not "your Google album AND the photographer's link, you have to look at both."
A tip: wedding albums get large fast. If uploads stall or photos stop backing up, check your Google account storage before troubleshooting anything else.
Organizing 1,000+ wedding photos by event
Once the album has every photo, the next problem is finding anything in it.
Google Photos' AI-powered search is the fastest way through a thousand-photo album. Search "cake" to find every cake-cutting photo. Search "kiss" to find every first-kiss attempt across the day. Search a specific person's name (if they're in your face groups) to find every photo of them. The search bar is the underused superpower of Google Photos at wedding scale.
For more deliberate organization, create separate albums for each event arc, getting-ready, ceremony, cocktail hour, reception, send-off. The same photo can live in more than one album at the same time without creating a duplicate, so a "first dance" photo can sit in both Reception and a separate Dance Floor album. Name each album with a date prefix ("2026-04-26 Reception") so they sort chronologically when you look back at this album in years to come.
A tip: do the curation pass by moment, not by chronology. All your first-kiss attempts compared side by side. All the toast photos lined up. It's much easier to pick the best version of a moment when you're seeing five candidates next to each other than when you're scrolling chronologically and the kiss is at photo 312.
Fixing dark reception photos
This is the moment the workflow earns its keep. Reception lighting is the consistent disaster of every wedding, mixed warm tungsten, cold LEDs from the DJ, occasional flash. Phone cameras underexpose to protect the highlights, so you end up with photos that are too dark to share without editing.
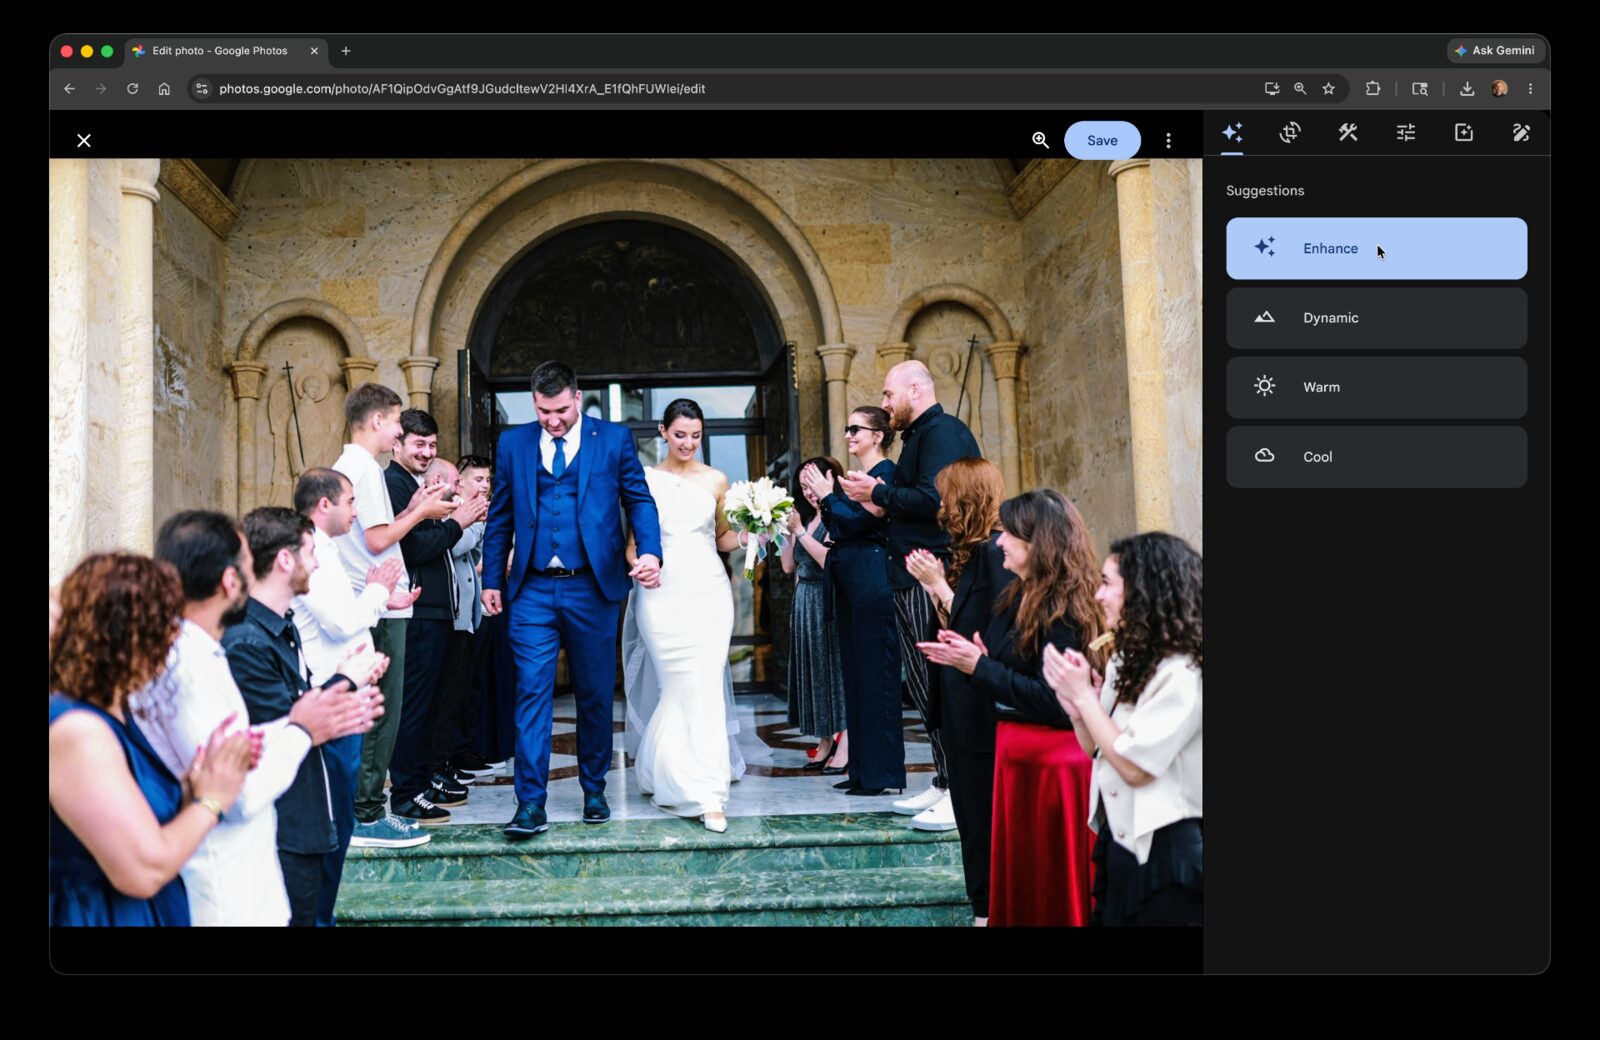
The single-photo workflow is straightforward. Open the photo, tap Edit, tap Auto Enhance, tap Save. The Auto Enhance pass corrects exposure and color balance and usually rescues an unshareable reception shot into something you'd happily put on the family group chat.
The trouble is volume. If you have 200 reception photos, expect 30 to 40 minutes of tapping through them one at a time. That's an evening on the couch you weren't planning to spend.
Or do it across your whole selection.
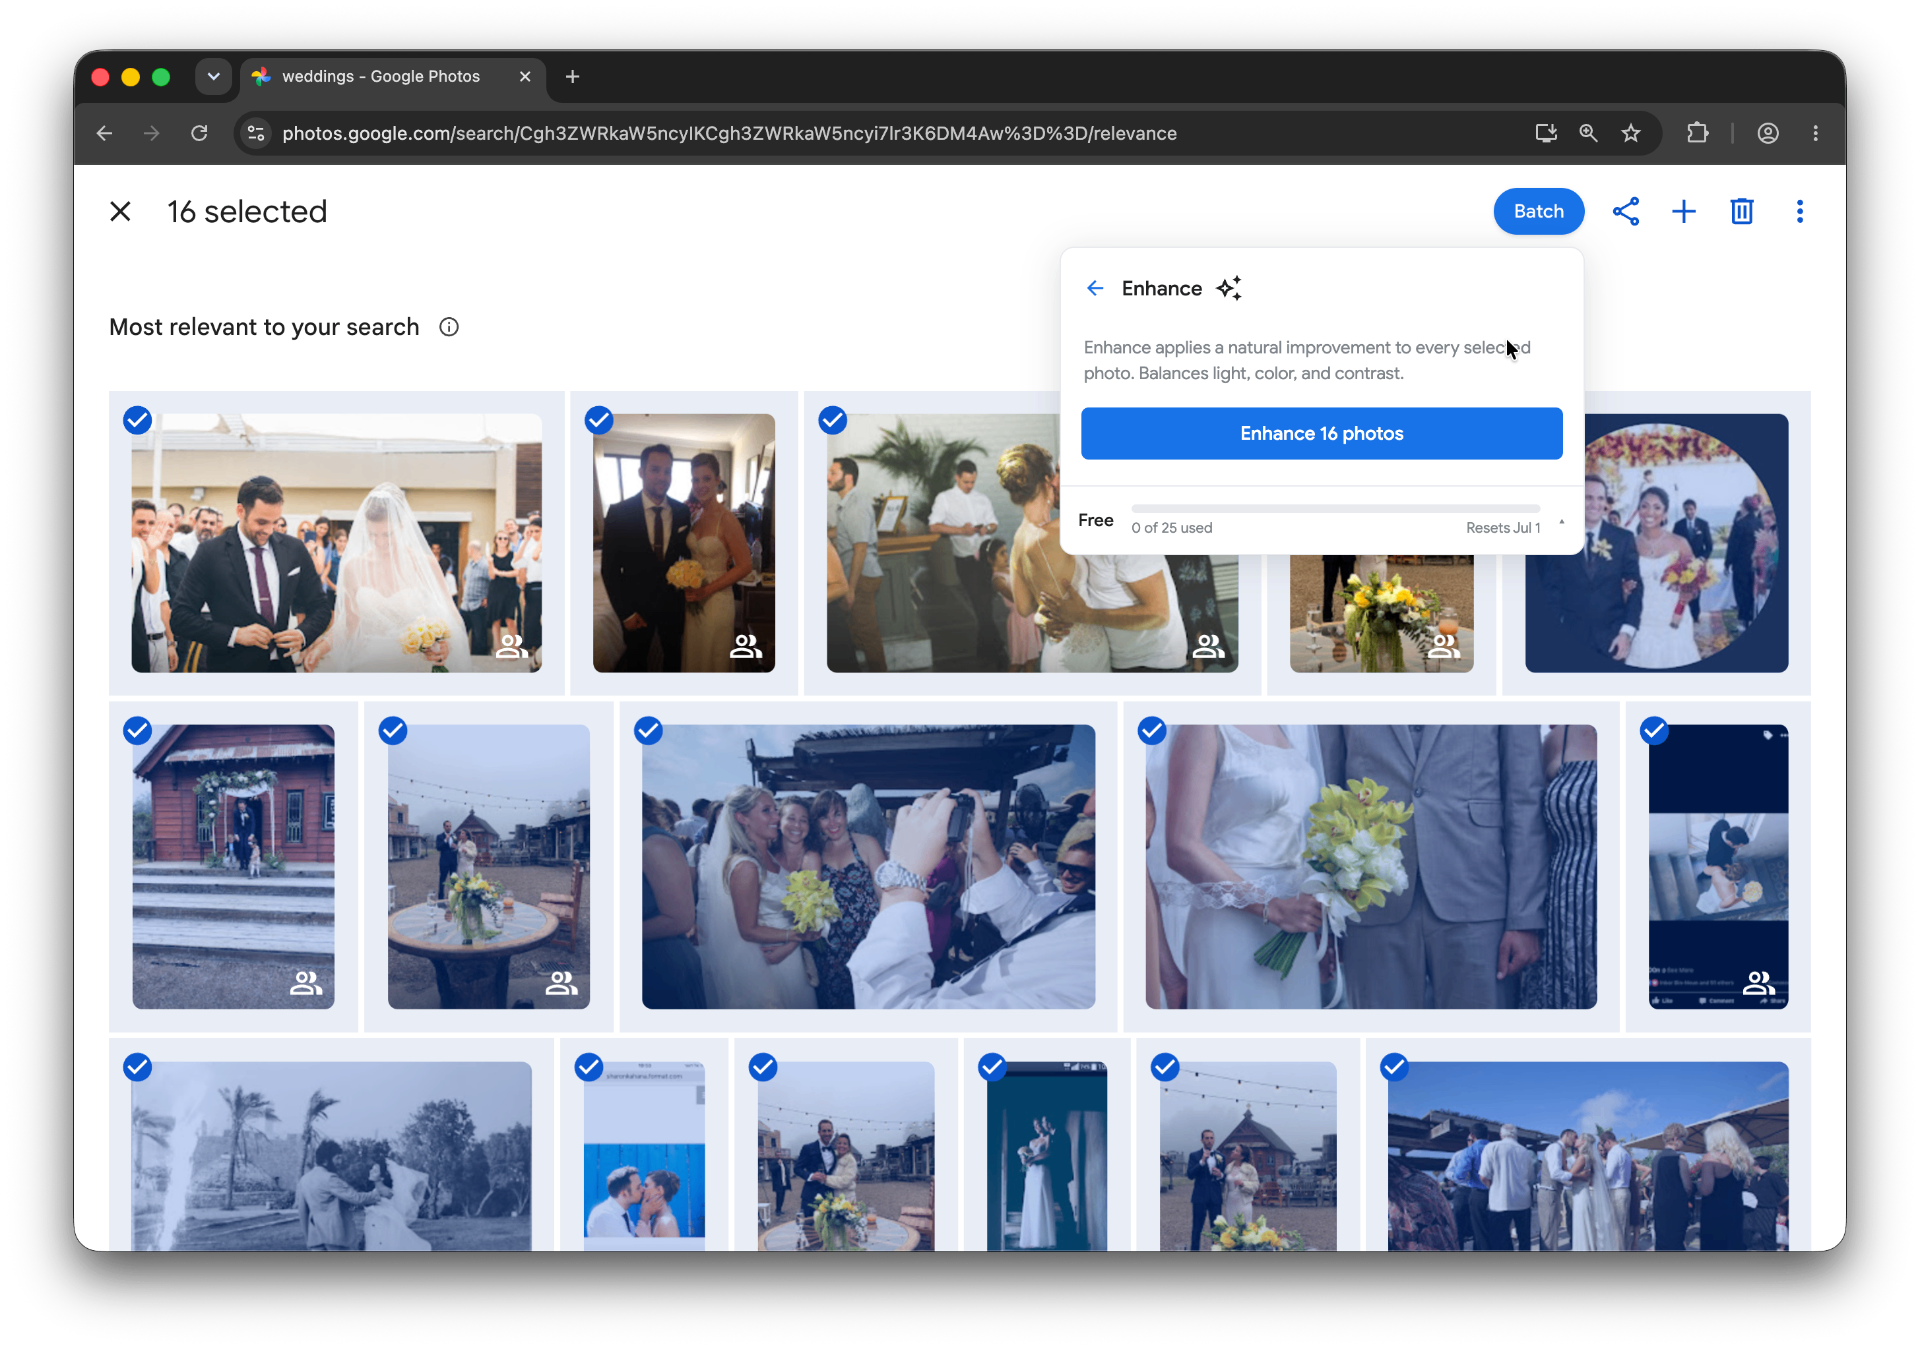
Batch for Google Photos is a Chrome extension built for exactly this. Batch never uploads your photos. The edits happen in your open Google Photos tab. For the full step-by-step version, see our guide to batch editing Google Photos. Select your reception photos in the album, click the Batch button in the toolbar, choose Auto Enhance, and let Batch work through the selection while the tab stays open. Two hundred photos take about 25 minutes hands-off, long enough to finish unpacking the wedding gifts, short enough that the album is ready by the end of the evening.
A practical note before you trust the batch result: zoom into three to five representative reception photos at full size after the batch finishes. Auto Enhance occasionally over-corrects skin tones in candle-lit rooms. The warm light gets neutralized and people's faces shift slightly toward yellow or green. If you spot it, the manual Adjust sliders (Warmth and Tint) will fix it photo by photo for the few that need it.
Pro for the month you're tackling this. The wedding cleanup is a one-time burst, a few hundred photos to enhance, then crop, then caption, and the Pro tier covers unlimited photos for the month. Once the album is done, the wedding photos and your edits are yours regardless of which tier you stay on.
Cropping wedding photos for prints, cards, and frames
After the editing pass, you'll want to print things. Different print sizes use different shapes, and they don't interchange. 4x6 prints, 5x7 thank-you cards, 8x10 frames, square Instagram posts. Each one needs a specific crop. Crop for the wrong size and you lose half the bridesmaids.
Single-photo cropping in Google Photos: open the photo, go to the Crop tab, pick an aspect ratio from the presets, adjust the crop frame, save.
For one photo, that's about thirty seconds. For 50 photos all going to 5:7 thank-you cards, same thirty seconds, fifty times. About an hour of repetition that produces the same outcome as one decision applied across the whole batch.
Or apply the same crop ratio across all 50 at once with batch cropping.
Same Batch tool, same workflow as Auto Enhance, select your photos, choose Auto Crop, pick the ratio (5:7 for thank-you cards, 4:5 for frames, 1:1 for square social), and let it run. The output is a set of photos cropped to the same aspect ratio, ready for whichever print service you're using.
One tip on the crop itself, applicable to both single-photo and batch use. Google Photos has a suggested crop that tries to center on the most visually important element of the shot. For close-up portraits this works well. For group photos, the bridesmaids in a row, the family portrait, the dance floor wide shots, the suggestion centers on a single face and may cut others out of the frame. Override the suggestion manually for those photos before running the batch, or accept that the group shots will need a second pass.
Pro for the month you're tackling this. The Pro tier's unlimited monthly cap covers the enhance-plus-crop-plus-caption arc all together, which is roughly the post-wedding workflow in three steps.
Captioning photos so you can find them in five years
Captioning is the part of the workflow most people skip. It's also the part you'll most regret skipping when you go looking for "the photo of mom giving her toast" in 2031 and Google's face groups don't help because mom looked different that night.
Captions in Google Photos live in the photo's info panel. On mobile, tap the photo and swipe up; on desktop, click the info icon at the top of the photo view. There's a field called "Add a description." Whatever you type there becomes searchable text across your library, type "Eleanor's toast at Smith reception" today, find it by typing "Eleanor toast" in 2031.
Manually adding a caption to one photo takes about twenty seconds. For a 200-photo reception album, captioning every photo individually means clicking through every photo. Most people give up after twenty.
The batch version of captioning is different from Auto Enhance and crop. Instead of running an automated improvement, it's applying the same human-written text across a whole selection, useful for event-level captions ("Smith Wedding · Reception · April 2026" on every reception photo). The whole batch becomes findable as a group, even if you never add per-photo detail. Same Batch interface, same workflow: select your photos, choose Add Caption, type the text, run. That's batch captioning for an event.
A tip on what to type. Tag specific people in captions when you can, Google Photos' face groups are good but not perfect, and a typed name is the fallback that lasts forever. "Aunt Eleanor" doesn't help if the search is "Eleanor Smith" or "Eleanor Smith Johnson." Use full names when you have them, especially for family members on the older side; future generations will be searching this archive eventually.
Pro for the month you're tackling this. Captioning is the slowest of the three batch passes, it's the one most people do last, after enhance and crop, when the album is otherwise complete and ready to share.
Sharing wedding photos with family who don't use Google
The photos are edited. They're cropped. They're captioned. Now you need to get them in front of the people who weren't there.
There are three real ways to do this, depending on who you're sharing with.
The shared album link works for view-only access without a Google account. Send the link via text or email; they click, they see the album in a browser. This is the path for most relatives, including the ones who only check email twice a week.
For grandparents who don't use the internet at all, the second path is to download a curated set of favorites and put them on a USB drive or print them at a local pharmacy. Use Download all (or multi-select and download) from the album menu. Email attachment limits are typically tiny (~25 MB), so a full-album zip rarely fits in a single message, pick the keepers and share those instead.
The third path, and the one that matters most for older relatives, is to print a Google Photo Book directly from your shared album. Open the album, choose the photo book option in the menu, follow the layout steps. A 50-page wedding photo book delivered to your grandmother's mailbox is the gift that gets framed on her wall. It becomes the artifact your great-grandkids will inherit, the thing future versions of your family will pick up off a shelf and turn the pages of. Most relatives won't say it out loud, but a printed book of your wedding lands harder than any link you can send.
A wedding album is one of the few photo collections that becomes part of the family archive forever. The hour you spent enhancing it, cropping it, captioning it, that work shows up every time a niece visits or a grandchild asks how grandma and grandpa met. Take the hour.
You've got the wedding album. You also now have a workflow that applies to every other photo collection you'll build over the rest of your life together.
The pillar guide on editing photos in Google Photos covers the editor's tools in depth, the same Auto Enhance, Crop, and Caption pieces you used here, broken down across every situation they show up in. Worth a read once the wedding album is done; you'll keep using these tools for everything after.
The vacation photos post walks through the same arc, organize, enhance, crop, share, applied to honeymoon and trip photos. If your honeymoon is coming up or recently happened, the workflow you ran today is the workflow you'll run again in a few weeks.
The family historian post on restoring old family photos covers the captioning approach in particular detail, the same "tag the people, include the date, use full names" pattern, applied to scanned family archives going back generations. Your wedding photos are the start of that archive; the captioning you did today is the foundation that lets your great-grandchildren find them.
For the reception block specifically — where the room lighting is uneven and you want every photo to feel like the same warm evening — see the Custom Presets guide. Tune one reception photo until it looks the way you want every reception photo to look, save it as a Custom Preset, and Batch applies that same warmth across the rest in one pass.
Your wedding album is now part of your family's permanent record. Edit it like the record it is.
Clean up the guest album before everyone stops asking
Batch helps enhance, crop, and describe selected wedding photos in Google Photos.
Start free · Works in Chrome on desktop · Photos stay in Google Photos
Where to go next
- How to bulk edit Google PhotosThe pillar guide to bulk editing in Google Photos.
- Enhancing vacation photos in Google PhotosFinish the vacation album in a Sunday afternoon.
- Restoring old family photos in Google PhotosFinish the family archive you've been avoiding for years.
- Free up Google Photos storage by converting Live Photos to stillsReclaim Google Photos storage by converting Live Photos to stills in bulk.