Editing Airbnb listing photos in Google Photos
Bulk edit Airbnb listing photos in Google Photos — brighten, crop, and standardize property shots without opening Lightroom.
Batch is not affiliated with Google. Google Photos is a trademark of Google LLC.
If you shoot your listing photos on your phone, your photos are already in Google Photos. That's not an accident. It's the most common setup for hosts who manage between one and a dozen properties. Professional listing photography can cost hundreds of dollars per property, and it doesn't always pencil out for a seasonal refresh or a lower-nightly-rate listing. So you tour the property with your phone, the photos auto-sync to Google Photos, and now you need to make them look cleaner, brighter, and more consistent without taking on a pro editing workflow.
If you've looked at Lightroom and decided it's overkill for what you're doing, you're not alone. Lightroom is the canonical answer for property photographers who shoot on a DSLR, but the learning curve and the desktop-first workflow don't fit the host doing seasonal refreshes between guests. This post is the in-between path. Google Photos is where your photos already live, so the editing happens there too.
Here's the arc. Confirm the auto-backup setup. Organize photos by property and room. Pick the hero shot and the per-room favorites. Brighten interiors. Crop for Airbnb (and Vrbo, and Furnished Finder, and Instagram). Apply a consistent filter across the listing so everything looks like it came from one operator. Upload.
This post will not replace pro photography for high-end listings. If you're listing a luxury property where photo quality drives the booking premium, hire a pro photographer. Lightroom and a paid shoot will outperform anything in this post. For the other ninety percent of hosts, read on.
How your listing photos end up in Google Photos
The setup is simpler than it sounds. On both iPhone and Android, Google Photos backup is in the app's Backup settings. The toggle defaults to off after a fresh install, so it's worth verifying the first time. Once it's on, every photo your phone takes shows up in your Google Photos library once it syncs, usually within a few minutes on wifi, longer on weak cellular.
This is what makes the whole workflow possible. Your property photos arrive in Google Photos without any manual export, no cable transfers, no AirDrop chains. You tour the property, you shoot, you go home, and the photos are waiting for you on your laptop when you open photos.google.com.
Twelve properties reshot twice a year is roughly 12 GB, within most Google One plans, but worth checking if you're on the free 15 GB tier.
A tip: shoot with auto-backup verified on before you start the property tour, not after. The most painful version of this workflow is finishing the shoot, heading back to your car, and realizing the photos went to your camera roll only. Verify before, not after.
Organizing photos by property and room
Once the photos are in Google Photos, the organizing problem starts. For one or two properties, this is trivial. For ten or thirty, it's the difference between a workflow that scales and a library that becomes a haystack.
For a hobbyist host with one to three properties, the answer is one album per property. Create the album in your library, name it after the property ("Lake House"), and add the photos from that day's shoot. Done.
For higher-volume operators, the album-per-property approach starts to break down at around ten properties. Google Photos doesn't support nested folders, so you can't have a "Properties" parent folder with sub-albums for each, the album list is flat. The workaround is a naming convention. "2026-04, Lake House, Living Room" sorts by date, then by property, then by room. Combined with Google Photos' search (search "kitchen" to find every kitchen photo across every property), the flat album list becomes navigable at scale.
The search-based workflow is genuinely faster than the album-tree workflow once you're past five or six properties. Searching "primary bedroom" returns every primary-bedroom photo across every property; searching "deck" returns every outdoor space. The naming convention exists so you can also browse the album list when you need a specific shoot, but day-to-day finding is search.
A tip: name albums with a YYYY-MM prefix so they sort chronologically, this is what tells you which photos are this season's and which are last season's. "2026-04, Lake House" is this April; "2025-10, Lake House" is last October. Without the prefix, the list jumbles and you end up uploading the wrong winter photos in summer.
Picking your hero shot and per-room favorites
A 40-photo property shoot doesn't translate to a 40-photo listing. Airbnb shows the lead photos prominently in search results; the rest live in the gallery. The hero shot, position one, is what travelers see when they're scrolling. Pick deliberately.
Airbnb's own photo guidance recommends an exterior or wide living-space shot first, then bedrooms, kitchen, bathrooms, outdoor space, in roughly that order. For most listings, a wide living-space shot is the safest hero because it communicates scale and feel. If your property has a true differentiator, a view, a pool, a hot tub, an architectural exterior, test that as the hero instead. The differentiator wins when it's genuinely the reason guests book.
In Google Photos, mark your shortlist with the favorites or star feature. Tap the star icon on each photo you want in the listing. Then sort the album by favorites to see your shortlist together, that's your listing in order. If you have 40 photos and you've starred 12, that's about right; Airbnb caps listing photos at a number that grows with property complexity, but most listings live in the 15-30 range.
A tip: when in doubt, default to the wide-angle main living-space shot. The hero is about scale and inviting feel, not visual interest. Save the differentiator hero (view, pool, hot tub) for properties where that's the actual reason people book.
Brightening every interior in a property shoot
Interior shots from a phone almost always come out dimmer than they looked in person. Phones underexpose to protect the highlights (the windows, the lamps, the bright surfaces), which means the rooms themselves end up dark. The first edit pass for any property shoot is brightening.
Single-photo workflow: open the photo, tap Edit, tap Auto Enhance, tap Save. The Auto Enhance pass corrects exposure and color balance and usually rescues a dim interior into something that looks like the room felt.
For a 40-photo property shoot, expect about 8 to 10 minutes of tapping if you're focused. Multiply across 12 properties before peak season and you're spending half a Sunday on this, every Sunday of the prep month.
Or do it across your whole selection.
Batch for Google Photos is a Chrome extension that handles exactly this kind of repetitive single-photo work across a selection. Batch never uploads your photos. The edits happen in your open Google Photos tab. For the full step-by-step version, see our guide to batch editing Google Photos. Open the property's album in your library, click Batch in the toolbar, choose Auto Enhance, and let Batch work through the selection while the tab stays open. The whole property takes about 5-6 minutes hands-off, short enough to fit between contract review and dinner, no babysitting required.
A practical note for property photos specifically: Auto Enhance occasionally crushes shadow detail in rooms with strong window light. If you have a room where the view through the window is part of the selling point, waterfront, mountain view, garden, spot-check that room's photos at full size after the batch finishes. The Adjust panel's Highlights and Shadows sliders fix individual photos manually if Auto Enhance went too far.
Plus is the right tier for ongoing work. Hosts running seasonal reshoots end up doing this four to six times a year per property; the volume adds up faster than you'd think.
Cropping for Airbnb's preferred dimensions
Airbnb generally auto-crops uploaded photos to fit its display, but it lets you adjust the crop frame within its uploader. The recommended source ratio is 3:2 landscape at typical phone resolutions. Cropping to 3:2 in Google Photos before uploading gives you control over what stays in frame; letting Airbnb auto-crop gives Airbnb control.
In Google Photos, single-photo cropping: open the photo, go to the Crop tab, pick 3:2 from the aspect ratio presets, adjust the crop frame, save. Done.
For higher-volume operators, the cropping problem multiplies across platforms. The same 30-photo property might need to land on Airbnb (3:2), Vrbo (different display ratio), Furnished Finder (different again), Instagram (1:1 or 4:5 for grid posts), Stories (9:16), and your own website (varies). Cropping the same set of photos to multiple ratios manually is hours of work per property, and it's the kind of work where a missed crop on one platform means the photos display awkwardly on a booking site for weeks.
Or apply the same crop ratio across all photos at once with batch cropping. Same Batch interface, select the photos, choose Auto Crop, pick the ratio, and let it run. Run it once for Airbnb's 3:2, again for Instagram's 1:1, again for Stories' 9:16. Each pass takes a few minutes; the manual alternative is each pass taking an hour.
A tip: shoot landscape for everything you can. Landscape source crops to vertical and square cleanly; vertical source rarely crops well to landscape. The exception is staircases, tall windows, and outdoor pergolas, those call for vertical source and become the awkward photos in your listing if you shot them landscape.
Plus is the right tier for ongoing work. Multi-platform crops across a property portfolio land inside the monthly Plus quota.
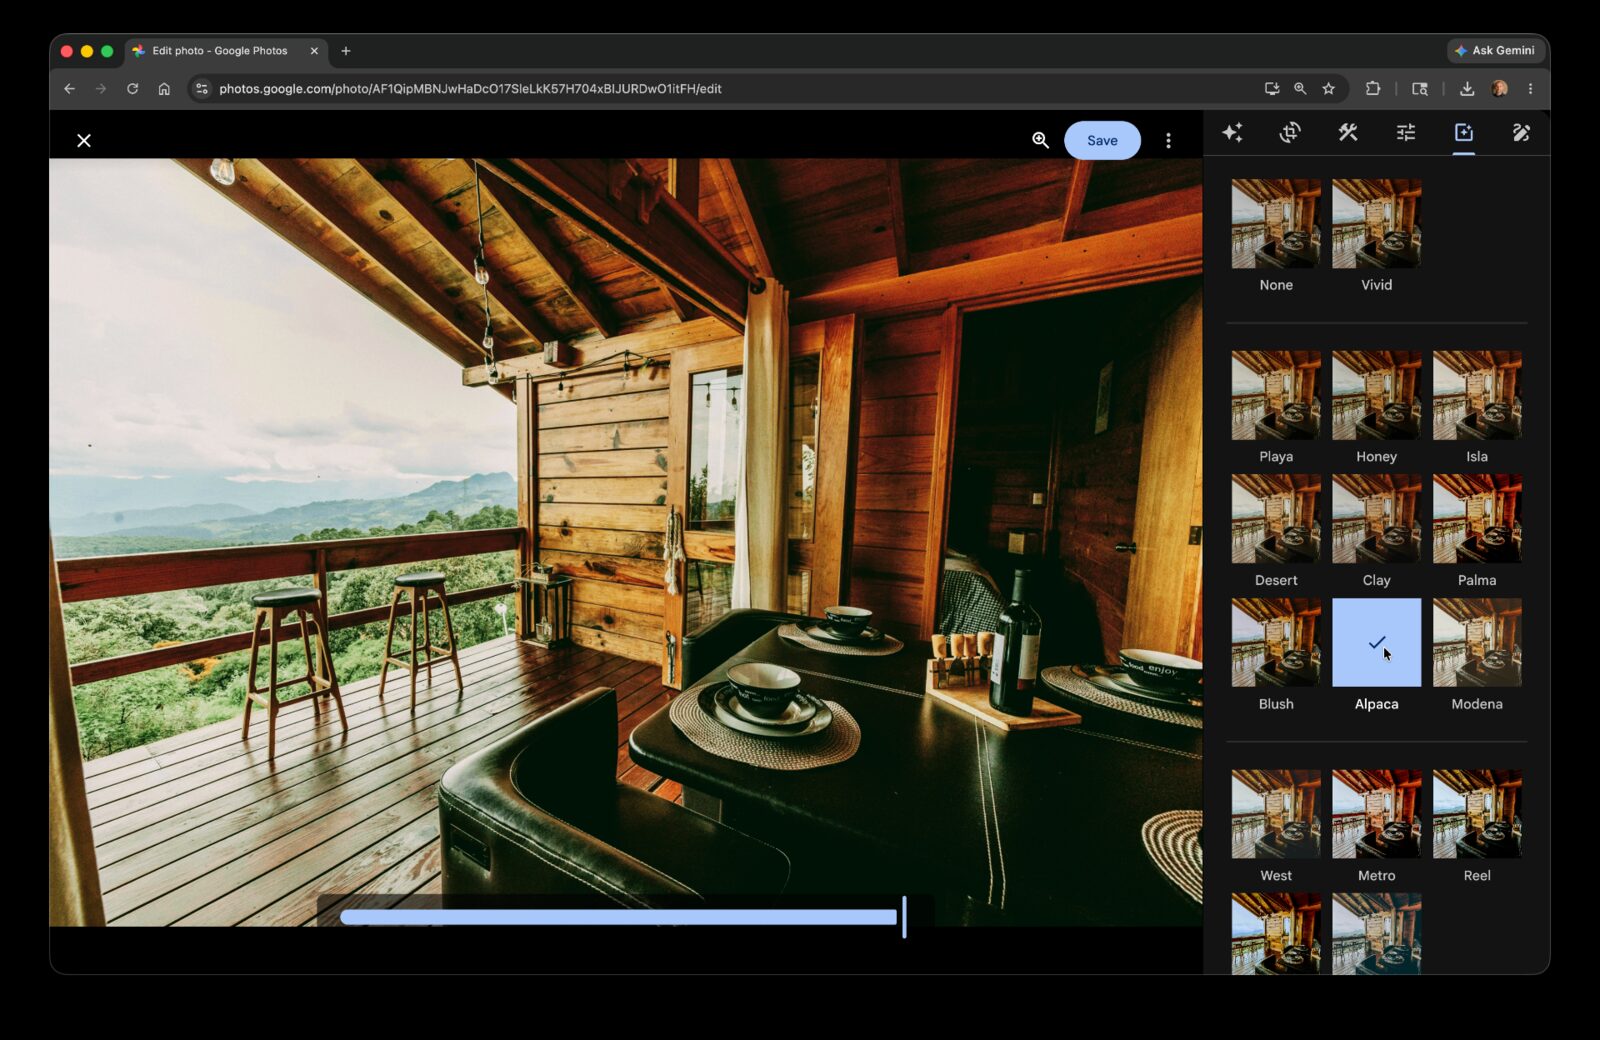
Applying a consistent filter across the listing
Your portfolio looks like one operator's work, not a patchwork of seasons. That's the goal of this section.
The filter pass is the part most hosts skip, because the volume math is even worse than the cropping math and the visual payoff is subtle. But for hosts running multiple properties or running the same property across seasons, a consistent filter across every listing photo creates portfolio cohesion that buyers feel without being able to name. The shot of the kitchen in spring should look like it was taken by the same person who shot the bedroom in winter, same color temperature, same warmth balance, same overall feel.
Google Photos has a library of named filters, each with an intensity slider that lets you dial the effect from subtle to heavy. For listing photos, subtle is the whole point, if a viewer notices the filter, it's too much.
For higher-volume operators specifically: pro photographers who shoot real estate build Lightroom presets to do exactly this work. A preset is a saved set of color and tone adjustments applied automatically to every photo. Without Lightroom, GP filters approximate the same effect, pick one filter, set its intensity at 30 to 50 percent, and apply it across every property shoot you do. The output reads as one operator's work even though the photos were taken months apart.
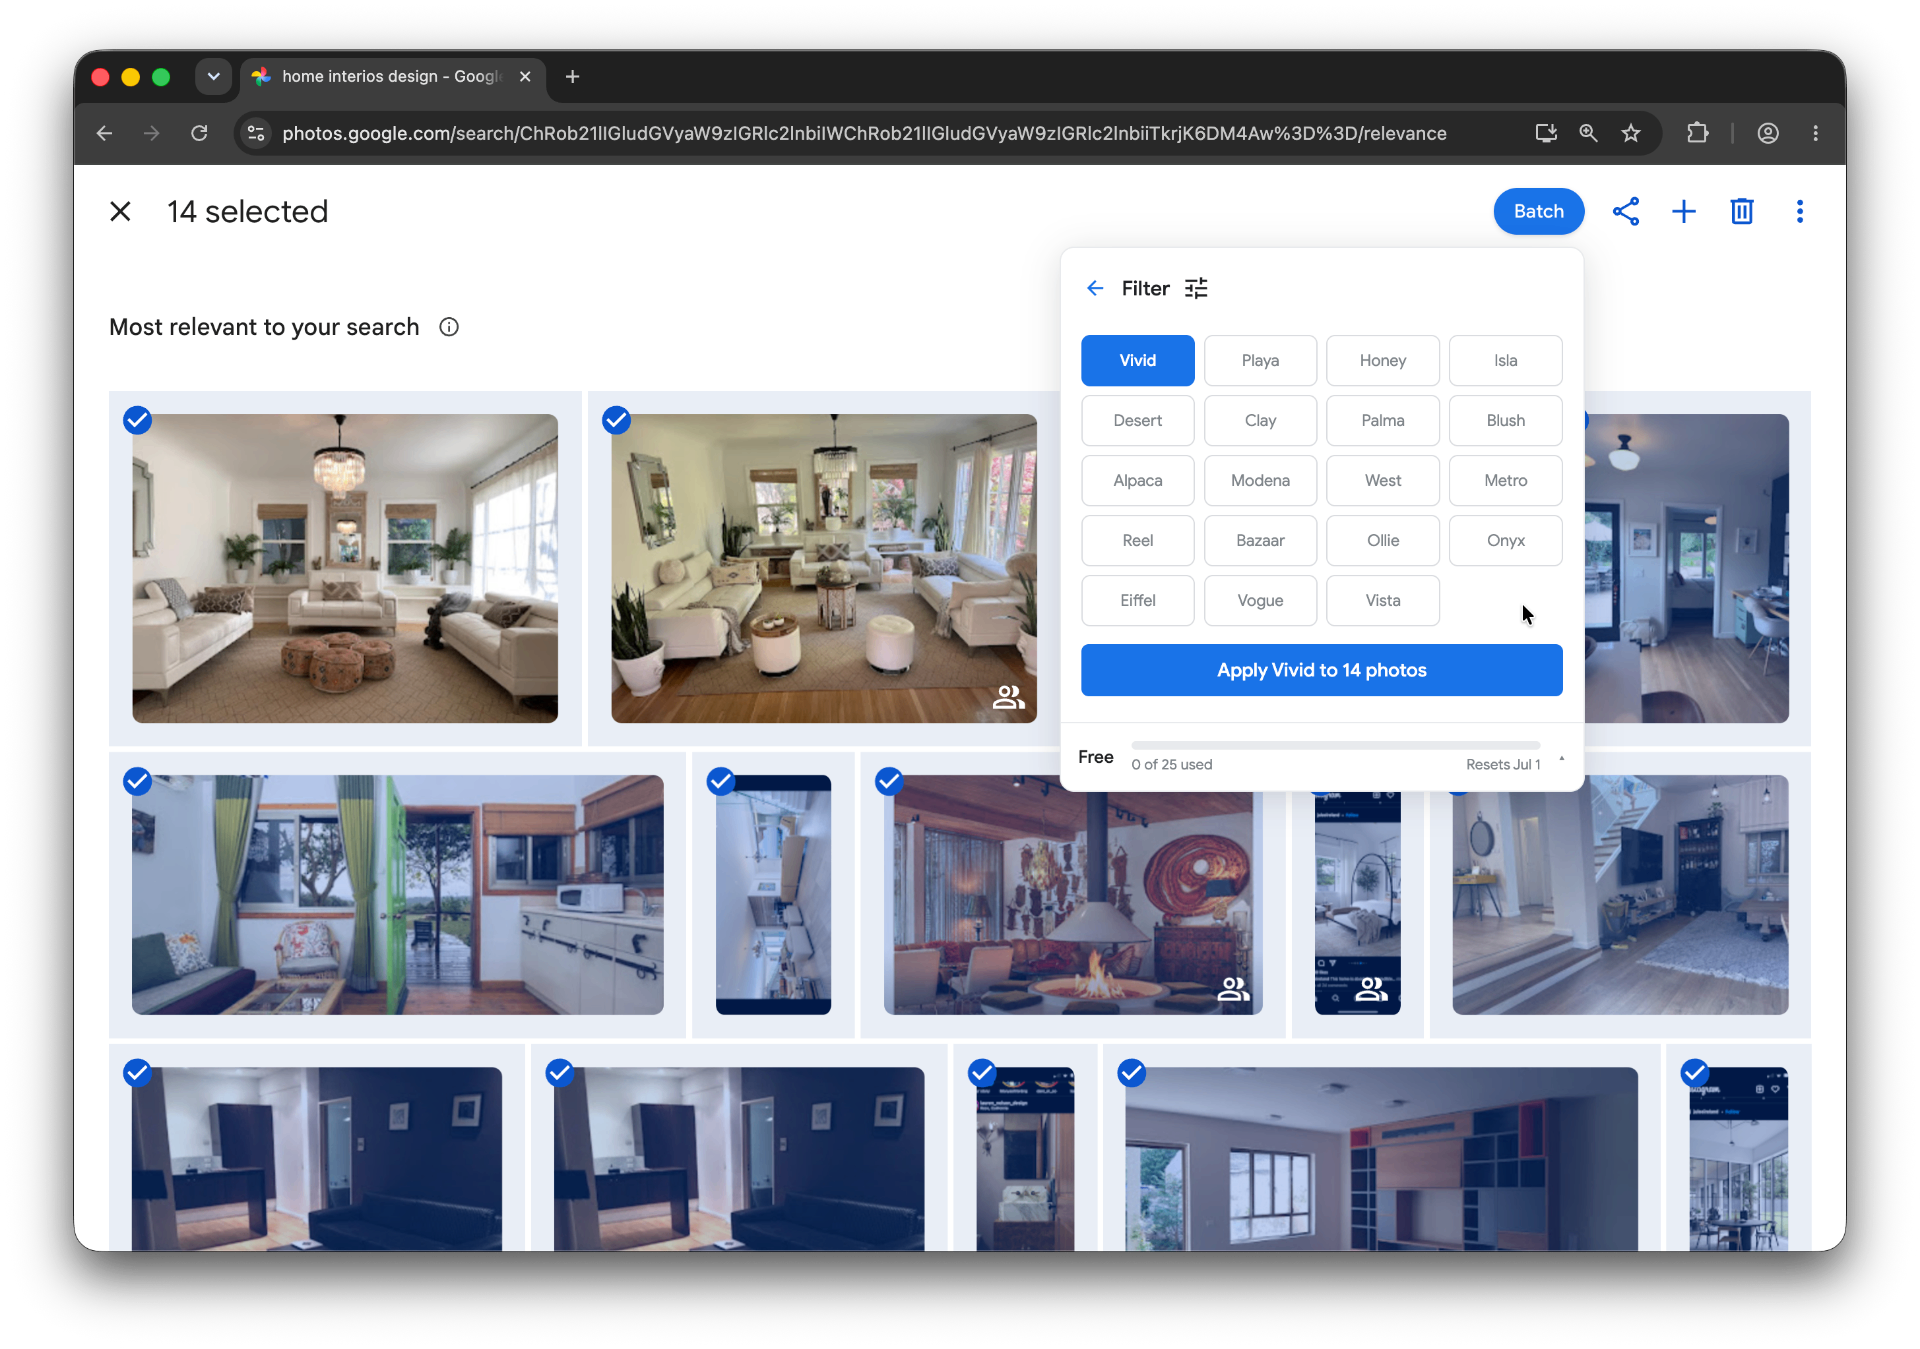
Or apply the same filter at the same intensity across your whole batch with batch filter. Same Batch tool, same workflow. Pick the filter, set the intensity, run. The whole property gets the same look.
A tip: a desaturated and slightly warm filter from the library tends to read as "professional listing photo" better than the heavy-saturation Instagram-style filters. Test on three reference photos before committing, one bright interior, one dark interior, one exterior. If the filter still looks natural across all three at 30-40 percent intensity, it's ready for the whole batch.
Plus is the right tier for ongoing work. Portfolio-wide filter passes a few times a year fit inside the monthly Plus quota.
Uploading to Airbnb (and Vrbo, Furnished Finder)
The photos are edited. Time to get them on the listing.
In Google Photos, multi-select the photos you want to upload, then download them to your computer or phone, either as individual files or as a zip from the download menu. From your computer, drag-and-drop into Airbnb's listing editor; from your phone, upload from camera roll directly into the Airbnb app.
Airbnb's listing editor has a photo reordering interface and a room-labeling feature that tries to guess which room each photo shows. The AI labeling is right most of the time but worth checking, it occasionally labels a kitchen as a dining room if there's a table in the shot. Same flow on Vrbo (their uploader is desktop-friendlier than mobile) and Furnished Finder (their uploader is functional but minimal).
A maintenance tip: schedule a quarterly reshoot calendar reminder. Outdated listing photos hurt bookings more than imperfect editing does, guests notice when the photos are obviously from a different season, and it shows up in reviews. A 20-minute reshoot once a quarter, run through this same workflow, keeps the listing feeling current.
You've got the listing edited, cropped, and uploaded. The same workflow scales to anything else you photograph at volume.
The pillar guide on editing photos in Google Photos covers the editor's tools in depth, the same Auto Enhance, Crop, and Filter pieces you used here, in the broader context of every other situation they show up in. Worth bookmarking for the parts of your library that aren't property work.
The real estate listing photos post walks through a parallel workflow for solo agents shooting MLS listings on a phone. Different platform, very similar problem, the cropping and filter sections in particular translate almost directly.
The reseller post covers the same batch workflow for product photos, with a particularly useful section on cropping product shots to 1:1 for marketplaces. If you're also reselling from your own purchases, furniture, decor, anything you've cycled through your properties, the workflow there is the same shape as this one.
For portfolio cohesion across multiple properties, the Custom Presets guide is the next stop. Build one preset per property type (cabin, condo, beach house) and apply it across every reshoot so the listings read as one operator's work without manually matching filters every season.
Your listing photos are the first impression. Edit them like a booking depends on it.
Refresh listing photos without opening Lightroom
Batch helps brighten, crop, and standardize property photos already in Google Photos.
Start free · Works in Chrome on desktop · Photos stay in Google Photos
Where to go next
- How to bulk edit Google PhotosThe pillar guide to bulk editing in Google Photos.
- Editing real estate photos in Google PhotosOne consistent edit pass across the whole listing set.
- Editing product photos in Google PhotosPrep an entire product drop without per-photo work.
- Free up Google Photos storage by converting Live Photos to stillsReclaim Google Photos storage by converting Live Photos to stills in bulk.